13 July 2024
The AWS Client VPN service is a common way to seamlessly connect users into internal networks, however administrators often need ways to ensure a heightened level of security considering the attack surface. In this post, I describe a low-tech, low-cost solution to better authenticate users using a second factor.
AWS Client VPN supports connection to federated providers, either via a dedicated Active Directory integration (via AWS Directory Service) or via a SAML provider. These options are good, however often this solution is required either in an environment without federation already established or where the VPN is required on mobile devices, which doesn’t have a supported way to perform the browser-based flow. Because of this, the mutual authentication option is an easy and convenient way to get going quickly and at a low cost.
The Active Directory integration does have the ability to integrate MFA natively, using a RADIUS server, however this typically is a complex setup.
The AWS Client VPN service does have the option to provide a client connect handler for the VPN endpoint. This handler is a custom Lambda function you can write to authorize or reject each new connection attempt. Typically, the intent would be to use device posture checks or username lookups from a datastore to evaluate the outcome of the attempt, however we do have a somewhat generous 30 second limit to work with. Notably, this check is in addition to the already established mutual certificate presentation, which takes place before this check is attempted.
A creative alternative solution is to make use of the Slack Bot API to prompt the user to confirm new connections. As users initiate a connection, the Lambda function is invoked and takes the Slack user identifier embedded in the common name of the issued mutual certificate, and uses the Slack Bot API to send a direct message in Slack to the user. The user doesn’t directly respond to the message however, and is instead prompted to give it a thumbs up 👍 reaction. Once the Lambda function sends the initial message, it then short polls the Slack endpoint to retrieve the reactions on its sent message. If it detects the correct reaction before the attempt times out, it responds with a successful authentication attempt.
Here’s what that looks like in practice:

The following assumes you have already set up a Client VPN endpoint using mutual authentication. The AWS docs do a pretty good job at walking you through this. You’ll also need appropriate permissions to install a new bot to your Slack workspace (this is typically allowed for non-administrators).
One modification to the process is to ensure you include the Slack ID of the user in the common name of the issued certificate to clients, like the following:
./easyrsa build-client-full <fullnameofuser>-<slackmemberid>.mydomain.com nopass
The Slack ID for a user can be found by clicking on the users Slack profile and selecting the “Copy member ID” option in the expand menu.
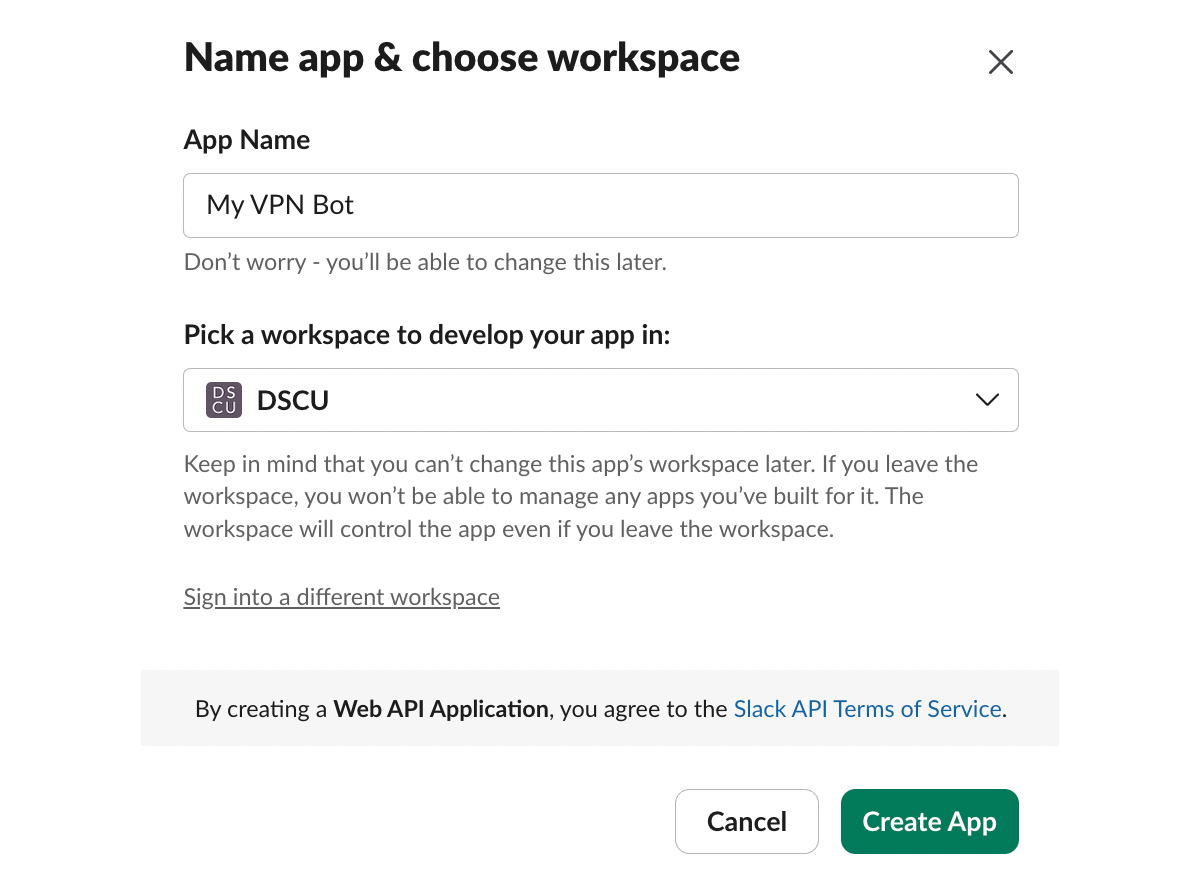
Next, we’ll set up the Slack Bot itself. To do this, visit https://api.slack.com/apps and click on the “Create New App” button. Use the “From Scratch” option, give your bot a new friendly name, and select the workspace to authorize your bot into.
I highly recommend scrolling down on the initial page and adding an App Icon for your bot to help distinguish it more.
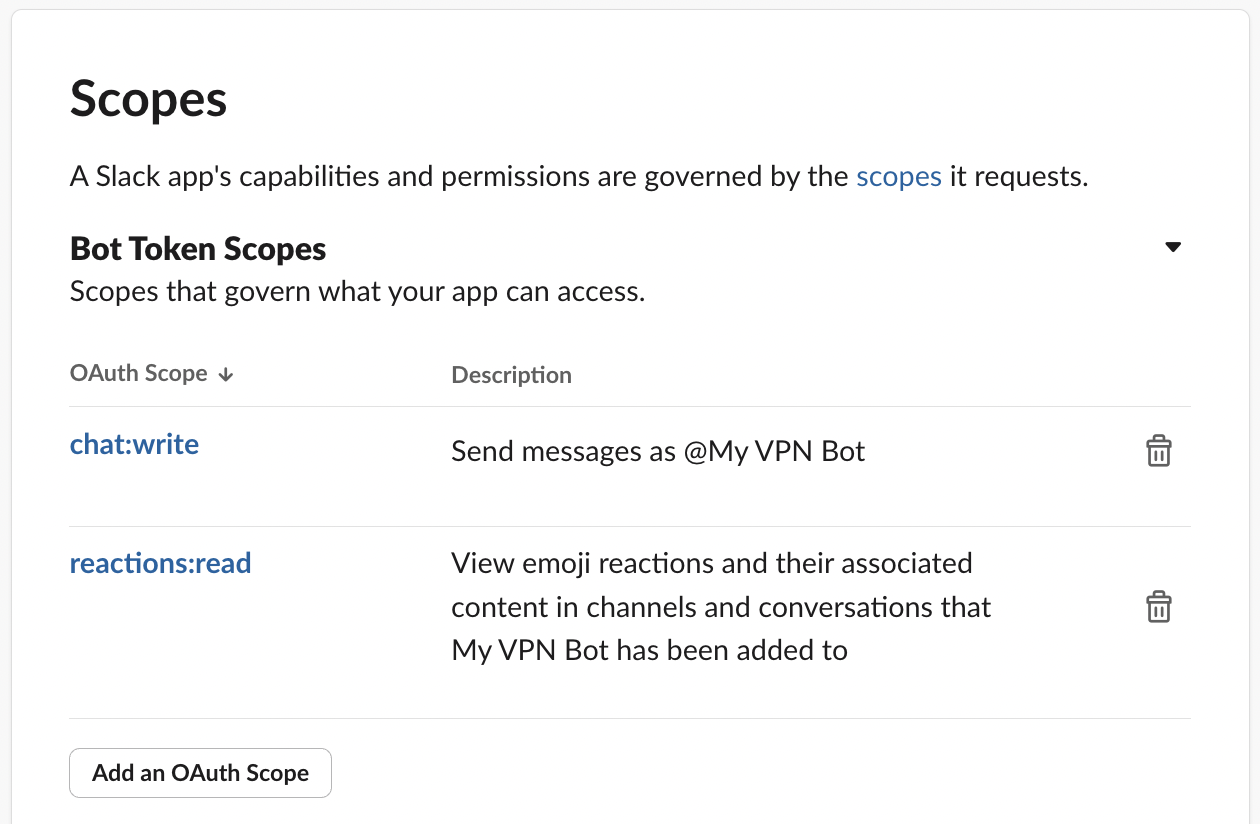
Navigate to the “OAuth & Permissions” page for the bot and scroll to the “Scopes” section. Add the scopes chat:write and reactions:read.
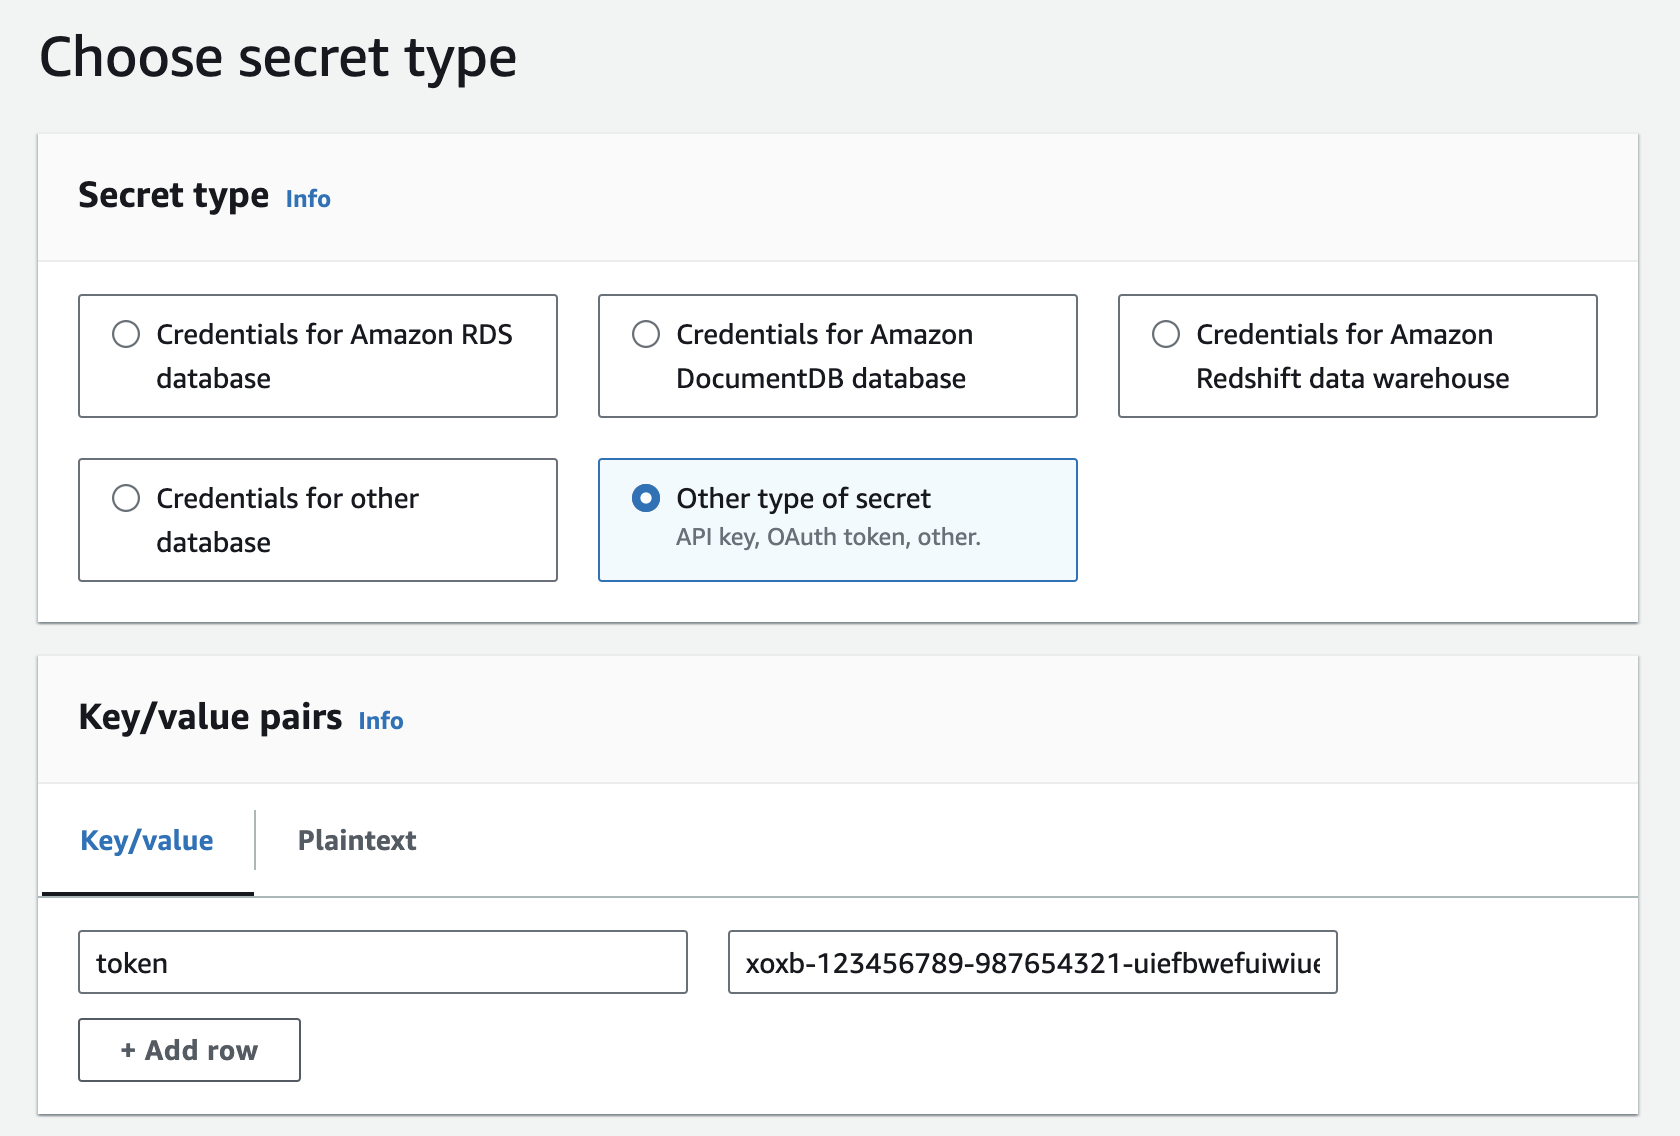
Once done, scroll up and click the “Install to Workspace” button. Authorize the request, navigate back to the “OAuth & Permissions” page and you should have a “Bot User OAuth Token” generated for you, starting with xoxb-.
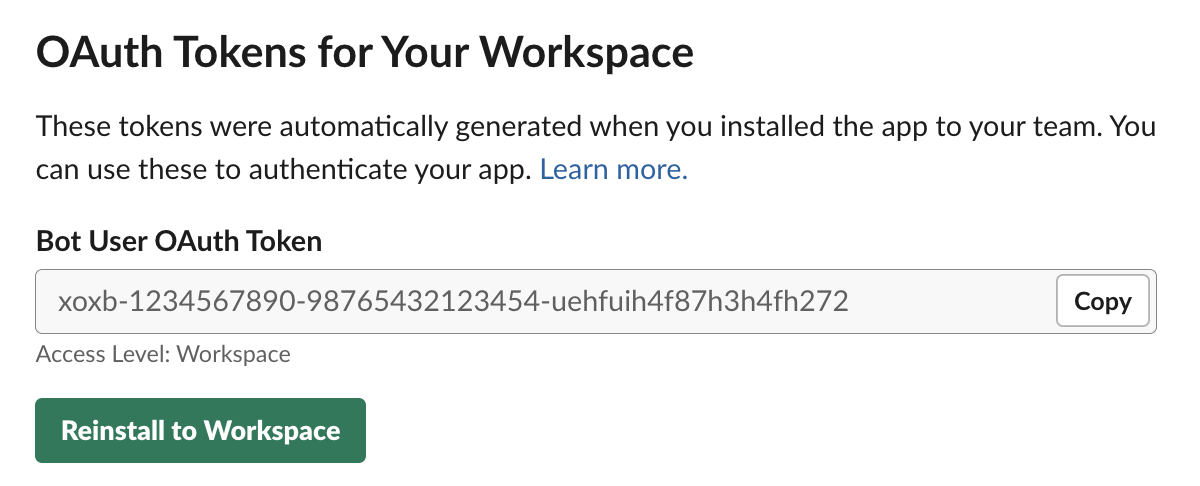
Take the “Bot User OAuth Token” and save it to the “token” field of a new Secrets Manager secret within your AWS account. I’ve called my secret “myslackbot” here but you can use anything you wish and modify the upcoming script as needed.
The final change is to create the authorization Lambda for the client connection handler. One particularly confusing limitation is that the name of the Lambda function must be prefixed with AWSClientVPN-. Below is the full Python source code for that - no external libraries needed!
import boto3
import os
import json
import pprint
import time
from urllib.request import Request, urlopen
from urllib.error import URLError, HTTPError
def handler(event, context):
client = boto3.client('secretsmanager')
secret = json.loads(client.get_secret_value(SecretId='myslackbot')['SecretString'])
channel = event['common-name'].split("-").pop().split(".")[0]
if len(channel) < 2 or len(channel) > 12:
return
body = {
'channel': channel,
'text': 'React with a :thumbsup: to this message to approve the current login attempt from ' + event['public-ip'] + ' (' + event['platform'] + ').\n\nYou must complete this action within 30 seconds.'
}
req = Request(
'https://slack.com/api/chat.postMessage',
json.dumps(body).encode('utf-8'),
headers={
'Content-Type': 'application/json; charset=utf-8',
'Authorization': 'Bearer ' + secret['token']
}
)
msg = json.loads(urlopen(req).read())
while True:
time.sleep(2)
req = Request(
'https://slack.com/api/reactions.get?channel=' + msg['channel'] + "×tamp=" + msg['ts'],
headers={
'Content-Type': 'application/json; charset=utf-8',
'Authorization': 'Bearer ' + secret['token']
}
)
reactions = json.loads(urlopen(req).read())
if 'reactions' in reactions['message']:
for reaction in reactions['message']['reactions']:
if '+1' in reaction['name']:
return {
'allow': True,
'error-msg-on-denied-connection': '',
'posture-compliance-statuses': [],
'schema-version': 'v2'
}
Once you’ve configured your client connection handler in the VPN endpoint, you have completed your setup and can test your new MFA solution for yourself.
The above solution was the result of running into a bunch of limitations, but then looking around and considering alternatives that may seem unusual at first however turn out to be quite effective. I’m reminded that this is a good skill to have and can lead to some new experiences that might benefit you in future circumstances.
If you liked what I’ve written, or want to hear more on this topic, reach out to me on 𝕏 at @iann0036.